Table of Contents
- Introduction to the Brother SE400: Your Versatile Crafting Partner
- Getting Started: Setting Up Your Brother SE400
- Mastering the Threading Process: Top and Bottom
- Your First Stitch: Sewing Basics and Beyond
- Beyond Sewing: A Glimpse into Embroidery Mode
- Brother SE400 vs. Singer Tradition: Which Machine is Right for You?
- From the Comments: Real Questions Answered
- Conclusion and Next Steps: Continue Your Sewing Journey
Introduction to the Brother SE400: Your Versatile Crafting Partner
The SE400 combines the simplicity of a home sewing machine with the creative range of entry-level embroidery. It’s digital, steady, and friendly enough that first-time users frequently leave comments celebrating that it “finally made sewing less intimidating.”

If you’ve ever dreamed of a compact machine that can sew, embroider, and cut threads automatically, this tutorial proves it’s within reach. For crafters expanding later to larger projects, accessories like magnetic hoops for brother embroidery machines extend its capability even further.
Why Choose the Brother SE400?
Its well-lit work area, automated threading system, and responsive foot pedal make setup almost effortless. Beginners appreciate how each guide—metal prong, tab, and groove—is clearly numbered, ensuring success without guesswork.
Key Features Overview
From its backstitch button for strong seams to the scissor icon that trims threads, the SE400 streamlines every task. A touchscreen enables quick stitch selection—perfect for anyone balancing multiple craft modes.
Getting Started: Setting Up Your Brother SE400
Powering Up and Initial Checks
Unpack the machine, situate it on a stable surface, and connect both cords: power below, foot pedal above. When the screen lights and a short beep plays, your SE400 is ready for action.


For those later adding embroidery accessories, the SE400 stands nicely beside advanced models like the brother pr1055x, which share a similar interface philosophy though aimed at professionals.
Mastering the Threading Process: Top and Bottom
Winding Your Bobbin with Ease
Place the spool of black thread on the top bar, lock it with the stopper, then follow the metal and plastic guides shown. Snap the bobbin clutch right to start winding; the needle won’t move while the bobbin fills automatically.


Inserting the Bobbin Correctly
Drop the wound bobbin so thread feeds counterclockwise, trace the groove, and tighten until the built-in cutter slices it neatly.


If the cloth still won’t pull when sewing, check that feed dogs are engaged—commenters solving similar issues reported that flipping the back switch to raise the feed dogs fixed it.
As your projects scale, stabilizers and modern magnetic embroidery hoop systems can make setup even faster for embroidery sections.
Top Threading Steps and the Automatic Threader
Route the top thread through all numbered paths, keeping gentle tension. Near the needle, guide it horizontally over the small silver bar before using the white lever on the left to feed it through automatically.


Advanced users mention that even large-frame models such as brother embroidery hoops follow similar threading logic, proving that basic technique scales across the brand line.
Your First Stitch: Sewing Basics and Beyond
Performing a Test Stitch on Fabric
Lay two pieces of fabric right sides together with the 5/8-inch seam lined to the guide, lower the presser foot, and gently press the pedal. Stitch a few steps forward, tap the reverse button to lock the seam, and continue through the full edge.


Engage the scissor icon at the finish to cut both threads for a tidy result.

Craft learners praised this simple process for how quickly they could start combining fabrics for masks or bags.
If your thread tangles or your fabric hesitates, beginners in the comment section found relief after confirming the presser foot pressure and ensuring fresh needles.
Even if you later switch machines, from a SE400 to something like a brother embroidery sewing machine, these fundamentals stay identical.
Understanding Different Stitch Types and Adjustments
On the touchscreen, the lightning bolt icon represents a stretch stitch ideal for knit fabrics. Accessing gap-free edges only takes a button swap. Adjust width and length digitally for decorative, buttonhole, or longer top stitches.

Consider that creative makers often pair their SE400 with brother magnetic hoops when transitioning to embroidery patterns—the tools complement each other beautifully.
Beyond Sewing: A Glimpse into Embroidery Mode
Attaching the Embroidery Harness for Creative Freedom
The transformation is quick: slide off the small side box, insert the embroidery arm until it clicks, and the touchscreen welcomes you to embroidery mode.

Viewers frequently ask about hoop compatibility, and while TockCustom didn’t dive deep here, it’s compatible with standard 4x4-inch frames—the ideal workspace for small motifs. If you’re upgrading to larger projects, accessories like brother magnetic hoop 5x7 provide generous stitching fields with stable magnet hold.
Brother SE400 vs. Singer Tradition: Which Machine is Right for You?
Cost vs. Capabilities: A Direct Comparison
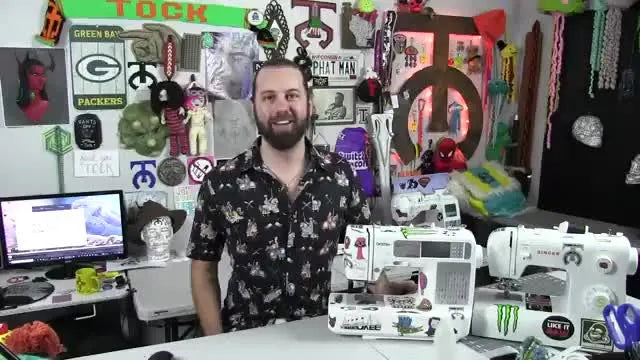
TockCustom handled both models hands-on. The Singer Tradition cost around $100, while the Brother SE400 retailed closer to $300. The clear advantage: the SE400 threads, sews, and embroiders digitally—a better companion for progressing crafters.

Personal Projects and Inspiration
The host showcased a fully self-made bag, stitched and embroidered entirely on this unit.

Dozens of commenters echoed appreciation—one even shared tailoring biker vests after learning here—proof that confidence grows rapidly with visible results.
Fans have also compared sister lines such as brother hoops and brother embroidery machine magnetic hoop options, exploring how expanded frames enable larger monograms or patchwork art.
From the Comments: Real Questions Answered
Common Setup Confusion
Several beginners struggled with bobbin winding until learning to snap the clutch right. One viewer discovered her fabric wouldn’t advance because feed dogs were down—raising them solved everything.
Troubleshooting Speed and Errors
The F05 speed sensor error diagnosed in the thread stemmed from a mis-set speed slider. Moving it back to normal restored function instantly. Patience and checking every switch saved multiple machines from unnecessary repair trips.
Encouragement and Community
A recurring theme: people who once avoided their sewing machines dusted them off thanks to this tutorial. TockCustom’s positive encouragement, close-up filming, and gentle humor created an approachable space for true beginners.
Conclusion and Next Steps: Continue Your Sewing Journey
You’ve powered, threaded, stitched, and glimpsed embroidery—the full beginner circuit. The Brother SE400 rewards practice, and every session builds muscle memory for smoother seams and ambitious designs.
Upgrade paths abound once you’re ready: larger units like the brother embroidery machine or accessories such as magnetic embroidery hoops can expand your creative horizon without overwhelming your workspace.
Whether crafting repairs, gifts, or custom bags, remember the core lesson from both the video and its vibrant comment community: start small, stay curious, and let your stitches tell your story.