Table of Contents
- Unboxing Your Embroider Buddy: Designed for Personalization
- Step-by-Step: Marking Your Design for Perfection
- Hooping Techniques: Getting Your Buddy Ready for the Machine
- Machine Setup & Stitching: Bringing Your Design to Life
- Finishing Touches: Reassembling Your Personalized Buddy
- Your Custom Embroider Buddy: A Keepsake for Life
Unboxing Your Embroider Buddy: Designed for Personalization
The Embroider Buddy toys are created with thoughtful features that crafters dream of. Hidden zippers and removable pods make this plush line from Creature Comforts Toys beginner-perfect for machine embroidery.

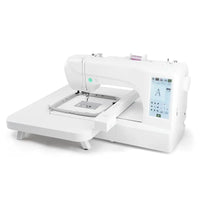
Each character—bear, dog, giraffe, bunny, cow, koala—has pods that can be removed to flatten the surface. That means even compact embroidery setups, including devices compatible with magnetic embroidery hoops for brother, can handle stitching without distortion.
The Genius of Removable Stuffing Pods
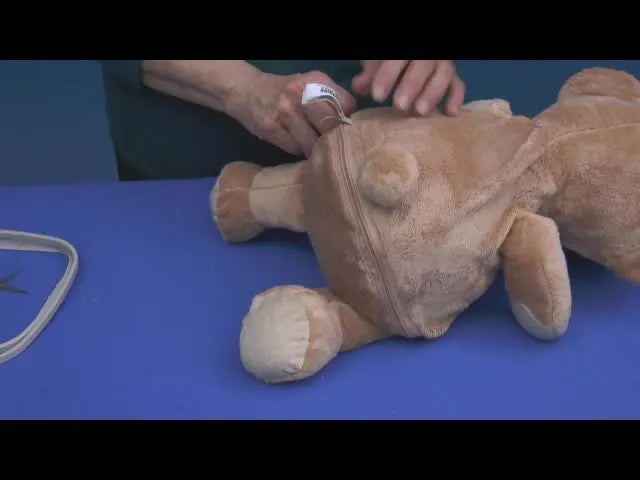
By unzipping the bottom, you pull out the belly and head pods.

This design allows you to slip stabilizer inside where stuffing would normally go, offering a flat work area that mimics standard fabric hooping.

Choosing Your Embroider Buddy Character
Select your favorite animal based on the event—a bunny for newborn gifts or a bear for birthdays.

Each model shares the same interior structure so your hooping approach remains identical across the collection.
From the comments: several viewers asked where to find these teddies; suggestions included looking on specialty plush sites or custom-gift vendors online.
Step-by-Step: Marking Your Design for Perfection
To prepare the plush, marking accuracy trumps speed. Begin by applying painter’s tape to the belly where you want the embroidery.

Why Painter's Tape is Your Best Friend
Painter’s tape is gentle and repositionable. Draw an arrow—this arrow should point toward the toy’s head, reminding you how to orient the design on screen or in your machine software.

For modern machines—whether your trusty domestic or a professional setup like a babylock magnetic hoop compatible system—maintaining orientation cues ensures lettering isn’t upside down.
Centering with Confidence: Using Seams as Guides
Look for seams at the neckline and belly bottom; align the tape between them to center the design. This extra second of measuring guarantees a balanced, professional finish for any stuffed surface.
Hooping Techniques: Getting Your Buddy Ready for the Machine
Once your mark is set, unzip the back fully and remove both pods. Hooping cotton fabric is simple; plush, however, demands stabilizer strategy.

Selecting the Right Hoop Size
Use the smallest hoop that accommodates your design—typically 4- or 5-inch square or 15-cm round for 16-inch buddies. It’s similar process whether you’re using a traditional frame or a magnetic option such as mighty hoop for brother pr1055x. These magnetic variants reduce stress on thick fabrics.
Stabilizer Secrets: Cut-Away vs. Float
For simple one-color text, float stabilizer beneath. For dense outlines or satin stitches, attach cut-away stabilizer with a light mist of embroidery spray adhesive.

After spraying, center it inside the plush belly.

The Self-Adhesive Stabilizer Advantage (Alternate Method)
If your hoop won’t fit through the toy opening, try self-adhesive stabilizer. Hoop that stabilizer, score the paper backing, peel it, then press the plush onto its sticky surface.

Many pros with commercial rigs—think magnetic embroidery hoops for brother vm5100—favor this technique because it keeps irregular shapes flat and secure.
Machine Setup & Stitching: Bringing Your Design to Life
Prep time pays off here. Before threading up, double-check your bobbin. Insufficient bobbin thread is one of the easiest ways to ruin a design mid-run.

Bobbin Check: Don't Run Out Mid-Stitch!
Run a test trace to ensure the design fits within bounds. Beginners using compact devices—say a brother embroidery machine—should remember to keep free movement between hoop and needle arm.
Aligning Your Design: Precision is Key
Rotate the design according to the arrow direction, match the needle to your center mark, and peel off the tape. For snug materials, a dime magnetic hoop can improve steadiness by locking plush layers evenly without manual tightening.
The Magic of Water-Soluble Topping
Place a lightly sprayed sheet of water-soluble topping over the embroidery area.

This temporary layer keeps stitches from sinking into fur, giving crisp outlines. Once dry, it dissolves away easily after the final rinse.
Finishing Touches: Reassembling Your Personalized Buddy
As your final stitch completes, remove the hoop gently. Clean up visible threads and any stabilizer remnants.

Trimming & Cleaning: Post-Embroidery Care
Remove topping and stabilizer. Use small scissors or snips to avoid nicking fabric. These same cleanup steps apply no matter your hoop type—even those heavy-duty systems like mighty hoop setups.
Pod Placement: Back to Full Form
Slide the pods back inside—head first, then belly. Hand stitching on pods should face the back. Align markings (B or F) if present, then zip the hidden closure.
Age-Appropriate Accessories & Final Inspection
Add the finishing touches—a satin bow or ribbon note works beautifully, but ensure they're safe for the recipient’s age.
From the comments: One viewer mentioned price differences among suppliers, so shop around for the best sourcing on official plush models.
Your Custom Embroider Buddy: A Keepsake for Life
At this point, your Embroider Buddy has transformed from blank plush to personalized treasure.

Gift it for birthdays, new arrivals, or holidays—its durability and charm make it a lasting keepsake. For creators who love experimenting with hoop technology, exploring accessories like magnetic embroidery hoops can further streamline your workflow.
Quick reflection: Embroidery artistry shines brightest when care meets creativity. With each stitch, you’re not just decorating a toy—you’re crafting a memory that hugs back.