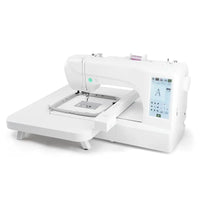
Regular lubrication is the unseen hero behind flawless stitches. This guide, based on BAI TV’s comprehensive tutorial, walks you through oiling and greasing key parts of your BAI embroidery machine—from daily hook care to biannual gear greasing. Learn the simplest lineup of oils to keep your stitches steady and your machine whisper-quiet for years to come.
Table of Contents
Introduction to Embroidery Machine Maintenance
The video starts with Alan from BAI TV outlining the goal: keep your machine’s performance steady by following a routine lubrication plan.

Why Regular Maintenance is Crucial
Oiling and greasing reduce heat, friction, and early part wear. Neglecting this step shortens machine lifespan and can throw off timing or tension.
Understanding Your BAI Machine's Needs
Each lubrication zone—hook, needle bars, shafts, and gears—has its own rhythm. The rotary hook drinks sewing oil daily, while the rear gear cluster only needs grease twice a year. Users seeking accessories like the bai embroidery machine hoop often forget that cleanliness and oil balance matter just as much as the right hoop.
Essential Lubricants and Tools
A solid maintenance session starts with knowing your materials.

Types of Oil: Sewing Oil vs. Synthetic Motor Oil
Sewing oil is your high-frequency friend—thin, easy to penetrate, and perfect for areas like hooks and needle bars. Synthetic motor oil, thicker and built for endurance, supports drive shafts and rails.

Understanding Lithium Grease
Applied with a soft brush, lithium grease cushions large gears and keeps torque steady. It’s a long-term barrier against metal-on-metal stress—ideal for gears inside your BAI housing or those supporting the bai embroidery machine frame.
Tools for Precision Lubrication
Use a long-spout bottle to reach narrow slots and an oiling pen for delicate bars. A cross screwdriver and soft brush complete the kit.

Daily & Weekly Sewing Oil Application
First up, the parts that move most often.

Oiling the Rotary Hook (Daily)
Unplug the machine before touching anything. Remove the bobbin case, clean loose thread, and add 3–5 drops of sewing oil to the rotary hook.


Lubricating the Needle Bars (Weekly)
Once a week, give the upper and lower needle bars three to five steady drops of sewing oil each. Use a long-spouted bottle for precision reach.


Keeping this rhythm ensures clean vertical motion and quieter operation—especially when using accessories like the bai embroidery hoops that rely on time-tight tension.
Bi-Weekly Synthetic Motor Oil Maintenance
This step targets the motor-driven path that powers every stitch.

Lubricating the Main Drive Shaft
Locate the small hole near your control panel and add 3–5 drops of synthetic motor oil every two weeks. This maintains speed consistency even on larger projects hooped with bai mighty hoop.
Oiling the X-Axis Rail
Rotate the rear black knob counterclockwise to expose the oil port. Drop 3–5 more into the rail channel. Wipe excess drips, and test motion by sliding the carriage lightly by hand.

Bi-Annual Lithium Grease Application
Twice a year, your BAI’s heart gets some heavy-duty care.

Greasing the Main Drive Gears
Power down, remove screws, and gently lift the side cover. With a soft brush, coat every gear tooth evenly with lithium grease as you manually rotate the black knob.

Applying Grease to Internal Connections
Move wires aside carefully and apply grease to the internal connection part.

The result? Smooth transitions between head movement and the control assembly. Frequent operators using multi-head frames like bai magnetic embroidery hoop find this step critical for stable synchronization.
Reassembly and Post-Maintenance Checks
Reinstall all covers and verify every screw is tightened. Align wires safely inside channels before closing panels.

When powering on, a “No Needle” notification may appear—press OK and turn the color-change knob until any number other than 00 shows. Your embroidery platform is now fully serviced.
Users working with advanced hooping systems such as bai magnetic hoops can combine this maintenance with calibration checks to ensure precise registration.
From the Comments: Real-World Maintenance Insights
BAI’s community weighed in with useful clarifications drawn from practical experience:
- Grease Selection: One viewer asked about using general Mobil 1 grease. BAI confirmed that fully synthetic or lithium-based versions are best.
- Oil Substitution: When another user wondered if sewing oil could replace grease, the official reply was clear—use lithium grease every six months for those back connections.
- Design Updates: Some skeptics noted differences between older and newer videos. BAI explained that after customer feedback, engineers simplified the lubrication layout to make upkeep more approachable.
- Performance Concern: A sewist saw thread tails after stitching; BAI advised contacting sales reps for assignable technician checks, suggesting potential hook timing issues.
Engaged feedback and timely responses reflect a learning loop between BAI engineers and machine owners—proof that consistent maintenance literacy benefits everyone. Many commenters noted smoother stitching and quieter runs after following these updates, echoing how the bai embroidery machine design rewards regular care.
Final Thought: Think of oiling as mindfulness for machinery—small, steady actions that keep creativity effortless. After every maintenance session, your machine hums more quietly and stitches more confidently.


