A comprehensive beginner’s guide to mastering the Janome embroidery machine interface. This walkthrough explains how to browse designs, use the lettering function, adjust hoop sizes, and make creative edits. Perfect for new Janome users who want clarity on screen icons, color management, and foundational embroidery operations.
Table of Contents
- Getting Started: Navigating Janome Embroidery Designs
- The 'Ready to Sew' Screen: Your Design's Blueprint
- Mastering Needle Allocation for Seamless Threading
- Crafting Custom Text with the Lettering Function
- Advanced Editing: Resizing, Rotating, and Arcing Your Creations
- Beyond the Screen: Machine Settings and Physical Controls
- From the Comments: Common Questions Answered
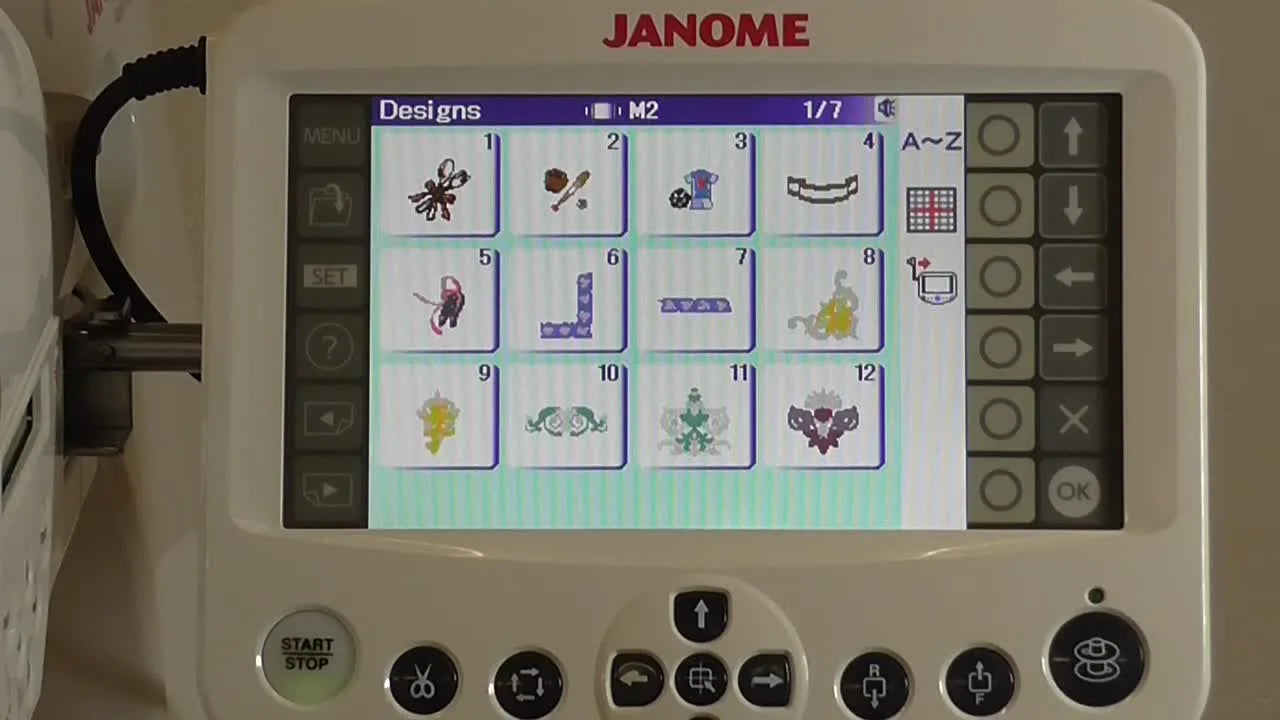
Getting Started: Navigating Janome Embroidery Designs
The journey begins on the Designs menu—your visual library of patterns categorized by hoop size (M1 through M3).

Use the left and right arrows to scroll through pages. Each hoop type represents a specific stitch area: M1 for large patterns, M2 for midsized, and M3 for compact motifs. For crafters comparing formats across machines, this logic is similar to the size differentiation found in magnetic embroidery hoops for janome.


The 'Ready to Sew' Screen: Your Design's Blueprint
Once a design is tapped, the machine displays its technical roadmap: hoop size (for instance, M2), stitch-out dimensions (67×79 mm), total colors, stitches, and estimated completion time.

Think of this as your dashboard—it previews time, color sequencing, and exact sizing so you can plan thread changes. The color‑toggle buttons on the right refine your view, letting you highlight a single thread section for precision editing.

If a thread breaks mid‑way, the forward/reverse stitch buttons allow you to retrace steps stitch by stitch—ideal for quick corrections.

Mastering Needle Allocation for Seamless Threading
Multi‑needle embroidery gets efficient when color planning meets smart setup. The Reallocate Needles interface lists color numbers alongside four needle positions. Tap a color, then use the arrows to assign it differently—for instance, use Needle 3 for Color 1 if your desired thread is already mounted there.

It’s a time‑saving trick for anyone juggling multiple hues without re‑threading. Machines with similar multi‑needle capabilities, such as the bai embroidery machine, also rely on comparable reallocation features.
Crafting Custom Text with the Lettering Function
Tap Menu → Lettering to open the text workspace. The right‑side Font Selection key reveals multiple styles like Gothic, Script, and Bauhaus. Navigation uses arrow keys rather than direct tapping, an interface note that beginners overlook.

You can flip between horizontal and vertical text, choose among large, medium, or small sizing, and toggle case options. When done, type directly on the on‑screen keyboard.

Advanced Editing: Resizing, Rotating, and Arcing Your Creations
Switching to the Edit screen unlocks creative refinements. First, verify your hoop selection under the M/T/S/J buttons; choosing a smaller hoop automatically condenses the layout if needed.

Drag to reposition elements freely in the grid view. Resizing tools then scale the design between 80 % and 120 % with visual confirmation on screen. If 120 % turns the text into a bold centerpiece, balance by reducing line spacing for harmony.


Rotation options range from 1° micro‑adjusts to 90° turns. This degree control mirrors pro‑grade precision often discussed by users comparing different models like barudan embroidery machine hoops.

Once you’ve achieved the right angle, move to Arc Lettering. Curving text upwards or downwards personalizes motifs for logos or name badges without extra software. Adjust spacing to keep curves readable.

Finally, open Color settings to change thread tones; the example switches to green for instant contrast.

From the comments: A few viewers wondered about designs exceeding the four‑color limit. The tutorial clarifies you can continue sewing up to any color count—rethread manually when prompted. It’s how most multi‑needle setups, including mighty hoop for brother pr655, handle large palettes.
Beyond the Screen: Machine Settings and Physical Controls
Under Open File, you’ll see three storage icons: internal memory, USB, and CD‑ROM. Active connections light up, letting you import custom stitch files.

While the video sticks to internal designs, users report that smaller USB drives (around 2 GB) communicate most reliably—a practical note echoed in the comments.
Next, the Set menu fine‑tunes parameters like screen contrast, units (mm/inch), eco‑mode timing, and maximum speed of 600 SPM.

The lesson ends with a tour of the physical controls along the bottom panel: start/stop, scissors, tracing, fine‑tune hoop centering, fast‑forward/reverse, and bobbin winding.

For anyone transitioning from simpler home models to semi‑commercial tools such as the mighty hoop tajima, understanding this tactile control layout reduces error during actual runs.
From the Comments: Common Questions Answered
Adding Lettering – Viewers asked how to layer text over a motif. The video’s lettering section shows how to type words, then combine them with existing motifs in the edit screen before pressing OK.
Going Back a Few Stitches – Use the on‑screen forward/reverse buttons for one‑stitch increments. Perfect for correcting broken‑thread spots.
Importing Designs – JPG imports aren’t direct; use compatible digitizing software to convert images into stitch files, then load via USB.
Large USB Drives – Community replies confirm small capacity drives are ideal if the machine fails to recognize larger ones—a tip common to various systems from magnetic hoops for brother embroidery machines to Janome.
Color Counts – If a project uses more than four hues, just rethread when prompted and continue—no need to split files.
Wrapping up
By the end of this hands‑on session, you’ll not only understand where every command lives but also gain intuition about layout adjustments and color planning. Whether you’re running a compact workspace or expanding into new accessories like janome magnetic hoop, routine navigation becomes second nature.
If your creative setup spans brands, the same logic applies—from magnetic embroidery hoops for brother series to magnetic hoops for embroidery machines. The Janome’s organized menu system makes an ideal foundation for exploring them all.