Kustom Garments shows how to transform a humble washcloth into a professional DIY chenille patch using HeatnBond and water-soluble stabilizer. This step-by-step guide breaks down each embroidery stage—from fabric prep to final satin stitch—based strictly on the tutorial video and community feedback.
Table of Contents
- Introduction: Your Guide to DIY Chenille Patches
- Gather Your Secret Ingredients: Materials List
- Step 1: Preparing Your Fabric for Embroidery
- Step 2: Hooping and Stitching the Outline
- Step 3: The Art of Trimming for Perfect Edges
- Step 4: Embroidering the Final Satin Border
- Step 5: Finishing Touches for a Professional Patch
- From the Comments: Community Insights and Q&A
Introduction: Your Guide to DIY Chenille Patches
The tutorial opens inside Kustom Garments’ workshop—shelves stacked with craft materials and an embroidery machine humming softly. It’s a relaxed tone but delivers surprisingly polished results.

This video underscores how professional results can come from creative resourcefulness. Instead of expensive chenille fabric, the maker reaches for budget washcloths. Combined with HeatnBond adhesive, they achieve a dense, textured appearance that rivals store-bought designs.
For creators working with machines like the brother embroidery machine, this is an accessible way to test appliqué techniques without specialized materials.
Gather Your Secret Ingredients: Materials List
Every successful embroidery build starts with the right lineup of materials.

The Perfect Fabric: Dollar Tree Washcloths
A 12-pack of assorted washcloths serves as the chenille base. The soft loops mimic real chenille texture while staying affordable.
The Key to Clean Edges: HeatnBond
Called out as the “secret sauce,” HeatnBond stiffens the cloth to cut cleanly and transforms the patch into an iron‑on. The host notes that skipping this step often leads to jagged, uneven edges.

The Disappearing Act: Water-Soluble Stabilizer
Water‑soluble stabilizer supports the design without leaving any visible trace. Once done, it simply peels or dissolves away. It’s an especially clever move for freestanding patches.
Using essentials like these, you can create textured initials, mascots, or logos without professional fabric mills. Enthusiasts working with magnetic hoops for brother embroidery machines will find these materials manageable even with frequent rehooping.
Step 1: Preparing Your Fabric for Embroidery
Color selection is simple—pick one that complements your design. Trim the washcloth and cut a matching piece of HeatnBond. Place rough to fabric back and use a mini iron to press firmly until it cools.

A well-bonded surface prevents the terry loops from pulling during stitching. Think of it as the backbone of your patch work. Crafters moving between projects may appreciate indexing fabric sheets in brother embroidery hoops sizes to keep pieces consistent.
Step 2: Hooping and Stitching the Outline
Hoop a single sheet of water‑soluble stabilizer, stretching it tight as a drum. Tap the surface—it should sound crisp.

Layer the prepared fabric on top and lock the hoop into the embroidery machine. Then start your tack‑down run. The video’s host doubles this step for strength—a smart detail often missed by newcomers.

Running a second pass gives a sturdier cutting edge, which is essential when trimming plush fibers.

If working on multi‑head models like the mighty hoops for brother pr1055x setup, duplicating outline passes saves time and keeps tension balanced across hoops.
Step 3: The Art of Trimming for Perfect Edges
Once the outline is stitched, remove the hoop and pause for precision work.

With curved scissors, trim closely around the tack‑down stitches without cutting through them. Patience pays off—clean edges mean cleaner borders later.

Curved embroidery scissors are the real MVP here. Dedicated users of brother embroidery magnetic hoop accessories often use them to trim appliqué texture fabrics safely within the frame.
Step 4: Embroidering the Final Satin Border
Slide the hoop back into your machine and let the satin border stitch do its magic.

The dense embroidery covers the raw edge entirely, giving that sharp varsity finish. Whether you’re operating a single‑needle home machine or something fancy like a magnetic embroidery hoops for brother vm5100, the principle remains: slow speed equals smoother coverage.
A consistent stitch density creates a professional edge that feels almost embossed.
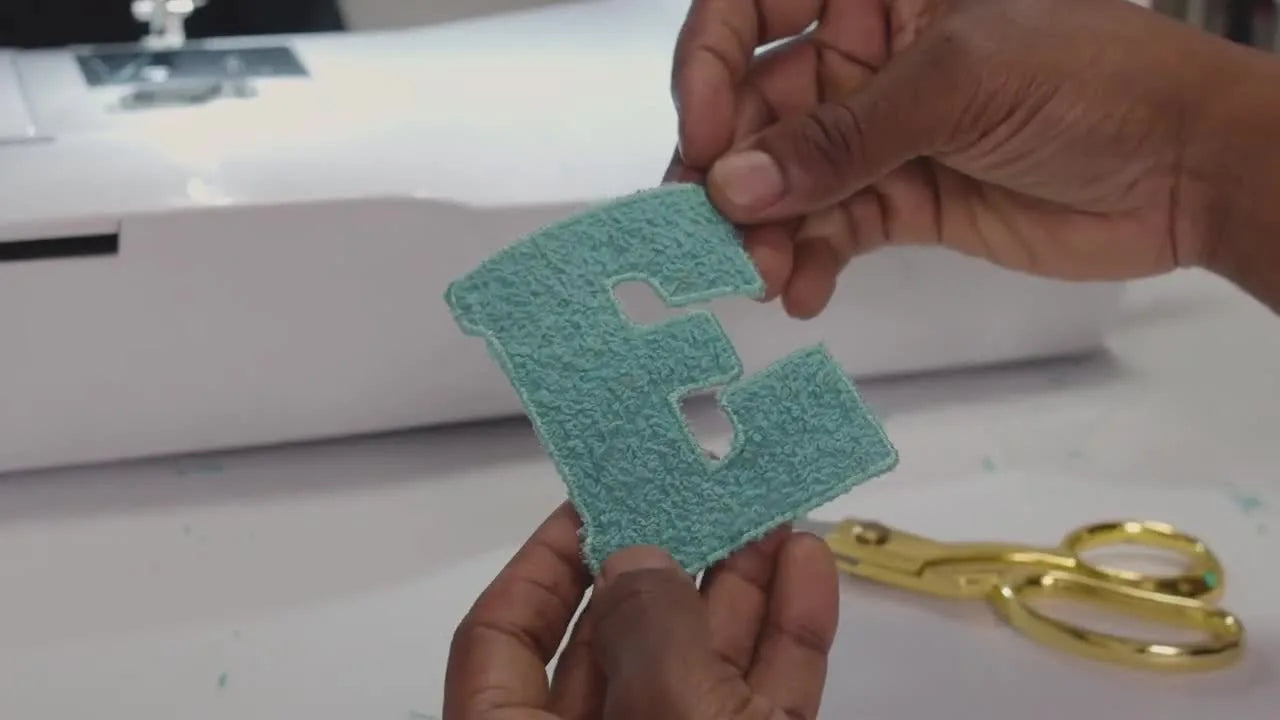
Step 5: Finishing Touches for a Professional Patch
When stitching is complete, carefully pop the patch from the stabilizer. That clean drum‑tight tension earlier now pays off—it releases with ease.

Finish by trimming tiny threads or jump connections.

Finally, peel off the HeatnBond paper liner to expose the shiny adhesive layer.


The patch is now ready to iron onto jeans, jackets, or tote bags.

The water‑soluble base leaves no trace, meaning your patch backs remain smooth and ready for pressing. For makers using brother hoopnetic magnetic sash frame accessories, this freedom lets you line up multiple patches before pressing.
From the comments: several viewers asked if the patch could be heat‑pressed. The video doesn’t explicitly confirm this, but since HeatnBond creates a fusible surface, that’s the intended purpose—pressing on fabric rather than sewing down.
From the Comments: Community Insights and Q&A
YouTube crafters flooded the comment section with helpful reflections that reveal where beginners often hesitate.
Transferring designs. Some wondered which embroidery software to use. The host doesn’t show it, but you’ll need a design file compatible with your machine. Appliqué designs must include separate sequences for placement, tack‑down, and satin stitches.
HeatnBond confusion. One viewer noticed needle gumming—a common issue when using very heavy adhesive types. The video doesn’t specify which variant is used, but pressing thoroughly at low temperature minimizes residue.
Machine type curiosity. The host uses a Brother embroidery model; exact specifics weren’t mentioned. The steps, however, translate cleanly across most consumer machines, including magnetic hoops for brother setups.
Safety talk. A frequent pro reminder from viewers: use sharp tools responsibly. Curved scissors are safe yet precise when used deliberately.
Positive takeaways. Dozens praised the tutorial’s clarity—especially how it revealed industry‑style finishing on a tight budget.
Community lesson: crafters learn faster collectively. Combining viewer tips with your own tests leads to an even smoother workflow.

Final Thought
The genius of this Kustom Garments demo lies in the combination of ingenuity and accessibility. Nothing fancy—no exotic supply runs—just dollar‑store finds and the confidence to experiment. Whether you’re testing designs for jackets, backpacks, or custom gifts, this chenille method turns ordinary washcloths into conversation‑starting texture.
So grab your washcloths, prep that hoop, and press play. You’ll never look at humble terry fabric the same way again.
For creative embroidery enthusiasts or those experimenting with magnetic hoops for embroidery machines, this tutorial proves that budget crafting can still deliver professional polish.