Table of Contents
Mastering Bucket Hat Embroidery: A Step-by-Step Guide

Getting a clean stitch on a hat with a curved brim can feel tricky at first. But once you grasp the stabilizing and hooping rhythm, your results will rival pro shops. Incorporating brother embroidery machine hoops can further improve precision on similar projects.
Essential Tools & Materials
Gather the essentials: a plain bucket hat, tear-away stabilizer (folded for extra firmness), clips, scissors, and your printed design template.

Keep all tools within easy reach to maintain accuracy throughout the process. When hooping lighter fabrics, small interventions like magnetic hoops for brother embroidery machines can make placement effortless.
Printing your design beforehand helps align the embroidery zone accurately.

The creator worked with a butterfly-themed logo, placing it front and center.
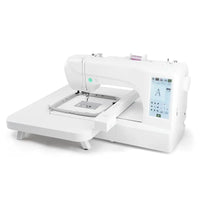
Setting Up Your Brother PR 680W
After snapping the cap driver into position,

insert your stabilizer sheet under the tab—a step that adds structural strength beneath the flimsy hat.

Raise the hat’s brim, slide it onto the driver, and center it. Precision is key here; uneven placement shows immediately when stitched.

The Art of Hooping a Flimsy Bucket Hat
A crafty trick lies in bending each corner seam so your bracket fits snugly over the hat edges.

Once secured, clips come in handy—holding tension steady without leaving marks.

Ensure both sides are clamped evenly so your fabric lies factory-flat.

From Design to Stitch: The Embroidery Process
Once your hat sits taut on the cap driver, mount the assembly onto the embroidery arm.

Load your digital file and confirm that the design fits cleanly in the workspace. Before committing to stitches, perform a trace test.

The trace visually outlines your planned design. This is where the Brother PR 680W shines—its sensors keep the hat brim clear of the needle travel path. Double-check placement; small adjustments now can save wasted thread later. Many experienced users note that switching to brother magnetic hoop options enhances alignment consistency for round items like hats.
Onscreen color mapping makes setup intuitive. Each needle correlates to a hue—yellow for the bee’s body, black for outlines, and so forth.

For vibrant, layered results, confirm that thread spools match both the design preview and the machine’s needle assignments.
Watch Out
If you ever see the design nearing brim stitching range, pause immediately and recalibrate your trace. Bucket hats can slump during stitching if unsupported.
Embroidery in Motion
Once satisfied with positioning, press OK and lock settings. The speed is set at 600 stitches per minute.

Next comes the hypnotic rhythm: 9,471 stitches dancing their way across cotton. The multi-needle precision offered echoes setups used with mighty hoops for brother pr680w, which accommodate hat contours reliably.
Color transitions pop as black accents deepen the yellow base.

When a thread break appears, stop calmly, re-thread, and press start to resume.

From the Comments
Viewers loved the tutorial’s clear pacing and glow-in-the-dark surprise. Many praised the calm approach to problem-solving—one noted how seeing the cap driver up close revealed just how big (and essential) it is for professional hat embroidery.
Special Touches: Glow-in-the-Dark Embroidery
Once the last stitch secures, remove the hoop and admire that gleaming design.

Tear away stabilizer bits from the back carefully.

The interior should look neat without visible support material. For flair, the creator used glow-in-the-dark thread on the butterfly’s wings—it radiates softly under dim light.

Adding such detail proves that technology like brother pr680w hat hoop and specialty thread can elevate even casual accessories into works of art.
Tips for Perfect Hat Embroidery Every Time
Fold stabilizer for extra stiffness on soft hats. Align center seams or front eyelets to gauge symmetry. Clip edges firmly but gently—a hat hoop for brother embroidery machine ensures stronger grip lines. Keep your trace inside the intended design box to avoid distortion.
If you pair these practices with dependable fixtures—such as brother embroidery machine magnetic hoop attachments—you’ll minimize slippage and cleanup.
Wearing Your Custom Bucket Hat with Pride
There’s a jolt of joy when you unhoop that final product and see crisp threads shaping your logo. Slide the hat on to test centering and fit—tiny adjustments now help refine future projects. Multi-needle systems like the PR 680W rival industrial gear in accuracy, especially when teamed with fixture supports like brother cap hoop for repeat jobs.
Conclusion: Your Next Embroidery Adventure Awaits
If you’ve followed along, you’ve guided fabric through stabilizing, aligning, tracing, stitching, and glowing. This same workflow adapts easily to beanies, visors, or tote bags. Experiment with stabilizer weights, thread textures, and accessory frames—magnetic hoops, hoops-within-hoops, and future-fit solutions like brother embroidery magnetic hoop all extend creative freedom.
Embroidering isn’t just about the stitch count—it’s about celebrating every loop that turns practice into wearable artistry.