Table of Contents
Step-by-Step Sketching with Pencil
Starting with the Heart
Begin with two small guide points: one near the top center of your page and one directly below it. Connect them with gentle, symmetrical curves to form your heart.

Each side should meet at the bottom point evenly. If one curve feels off, adjust it using your eraser until balance feels right.


Adding Stitch’s Body Parts
Place two small circles just under the heart for Stitch’s feet, spaced evenly. Then, draw two slightly tipped ovals on either side of the heart—these become his hands clutching it.

Clean up your overlapping pencil lines with light erasing to clarify which shapes sit on top.

Refining the Head and Face
Above the heart, draw a tall upside-down U to outline Stitch’s head. Connect with smooth, rounded curves for cheeks. Add a circular nose just above the heart and a broad smile extending behind it.

Erase any remaining overlaps where the face crosses the heart—this creates depth.

Then draw two large eyes symmetrically on each side of the nose, finishing the pencil phase once you add his raindrop-shaped ears curving upward.

Outlining Your Stitch with Marker
Defining the Body and Heart
Now the fun commitment: swapping pencil for marker. Outline the feet first, adding small oval toenails. Follow the curves with slow, confident strokes.

Outline the heart carefully to emphasize its bright centerpiece.

This contrast helps the softer pencil texture disappear beneath bold marker lines.
Bringing the Face to Life
Outline Stitch’s head next, adding three small zigzags of fur at the top, then trace his nose and mouth.

Add tiny nostrils with smooth arcs. For eyes, trace your ovals with a slightly pointed upper corner to mimic his playful expression. Fill them black while leaving small white ovals for light reflection.

Adding Ear Details and Eyebrows
Finish your outlines by following the pencil edges of each ear—don’t forget those iconic notches that make Stitch unmistakable. Add inner curved lines and two upside-down U’s above each eye for brows.

At this stage, your drawing pops with confident, smooth lines.
Adding Color to Your Masterpiece
Erasing Pencil Lines
Before adding color, gently erase all remaining pencil marks.

Ensure the marker lines are completely dry to avoid smudging.
Choosing Your Colors
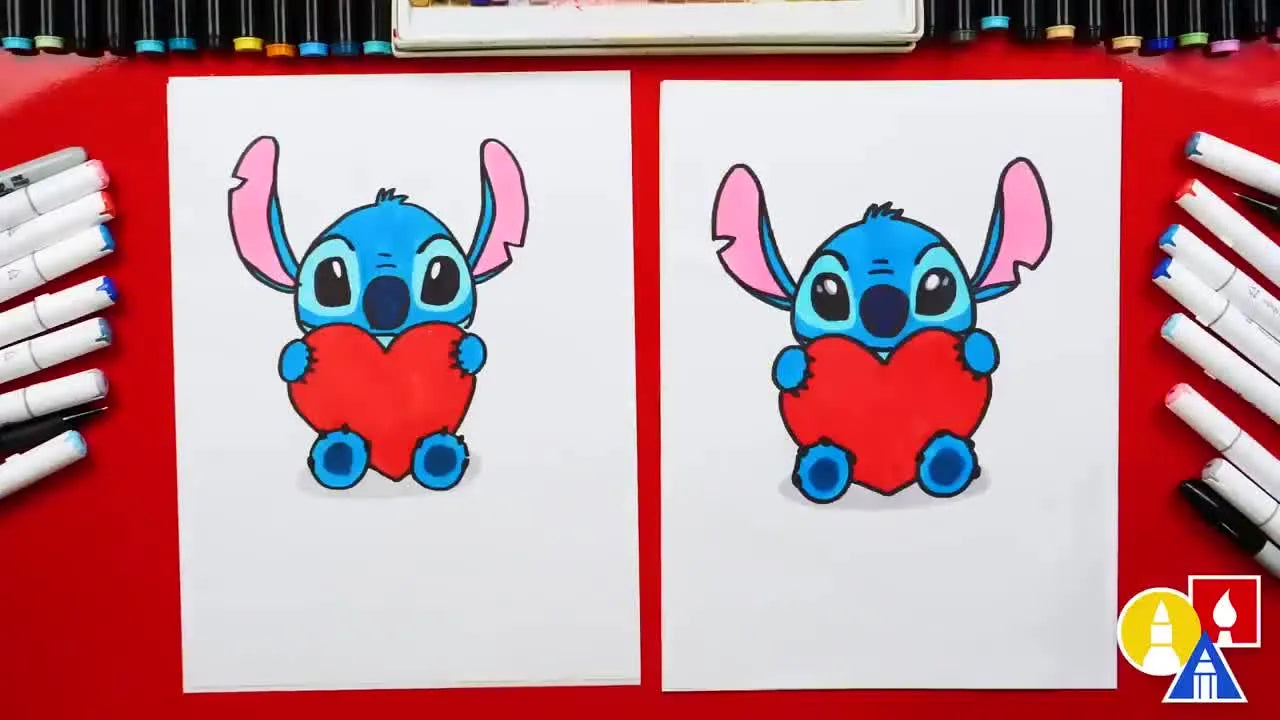
Color Stitch’s body in a charming mid-blue, shade his inner ears and nose pink, and fill the heart with bright red tones. Begin lightly in corners before adding layers of color.


Tips for Vibrant Coloring
If you’re using markers, keep strokes consistent and lift slightly at the end of each pass for smooth coverage. Colored pencils blend nicely if you prefer a softer tone.

You could use these same shading techniques for designs with machine embroidery too—think of how smooth fills work in digitizing. That precision relates closely to the stability you’d get using tools like magnetic embroidery hoops, especially on multi-needle setups such as mighty hoops.
Personalizing Your Stitch Drawing
Adding Backgrounds and Details
Now that your Stitch holds a heart proudly, consider adding context: maybe a galaxy backdrop or sandy island floor. Crafty fans often experiment across mediums—printing outlines onto fabric and stitching color with embroidery machines. Such integrations pair neatly with stable framing systems like magnetic hoops for embroidery machines, ensuring artwork stays even during stitching.
Making It Your Own
Add shadows under the feet or gentle blush marks on cheeks for personality. You can go wild adding glitter highlights or layering transparent hues. For those exploring textile adaptations, pairing your art with embroidery machine hoops offers alignment precision that echoes drawing symmetry.
> From the studio: Artists often replicate their favorite cartoon moments in both pencil and thread. If that inspires you, exploring specialist options like baby lock magnetic hoops or magnetic embroidery frames can elevate fabric-based projects.
Conclusion: Keep Practicing!
Embrace Your Unique Style
Each version of Stitch will look a little different, and that’s the joy. The Art for Kids Hub lesson reminds us that variation means creativity. Whether drawn on paper or adapted to a digital embroidery pattern using brother embroidery machine, the spirit of the exercise is experimentation and fun.
Share Your Art
Snap a photo of your finished drawing and show it off to friends or family. Try translating your sketch into embroidery using compatible hoops like magnetic hoops designed for precision placement. See your Stitch come to life—on screen, on fabric, or framed in your workspace.
Practice makes progress, not perfection, and Stitch’s grin will remind you of that every time you draw again!