Discover how fusible thread can revolutionize your quilt finishing. This hands-on tutorial shows a simple, accurate way to secure your binding before topstitching—no pins required!
Table of Contents
Introduction: The Secret to Perfect Machine Binding

Fusible thread may sound like magic, but it’s simply a heat-reactive fiber that melts when pressed. Think of it as double-sided tape built into your seam. Once you’ve used it, clips and hand basting may become a thing of the past.
What is Fusible Thread?
It’s a specialty thread that goes into your bobbin. When stitched, it creates an invisible glue line that’s activated later with steam and heat. In this tutorial, Charlotte’s Web Fusible Web is featured, inserted in the bobbin while regular thread remains on top.

Benefits of Using This Technique
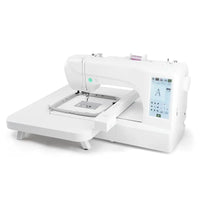
The real advantage is control—especially around corners and long edges. The fusible line holds the binding exactly where you’ve pressed it, giving you confidence when you return to the machine for the final seam. Pairing this with a modern sewing setup, such as a brother sewing machine, makes for efficient, consistent results.
Step 1: Preparing Your Sewing Machine

Before you begin, wind a bobbin with fusible thread. Insert it into your machine’s bobbin case, and keep standard sewing thread on top. For the demonstration, the instructor used a Baby Lock machine, but the method applies universally.
Pro Tip
Label your bobbin with permanent marker—"fusible"—so you won’t mix it up later. That little precaution can prevent melted thread in future projects.
If you prefer compatibility references, similar steps apply when threading on setups using specialized attachments such as a mighty hoop for brother embroidery machine—though here, we’re focused solely on quilting stitches.
Step 2: Attaching the Binding to the Quilt Back

Lay your quilt sandwich right side down. Align the raw edge of your binding with the quilt’s outer edge. Stitch with regular thread on top and fusible in the bobbin, attaching the binding to the back side. This creates a temporary glue strip visible as a pale line along the seam.

Quick Check
Gently tug the edge—those stitches should hold but remain flexible before pressing.
One commenter asked how wide to cut the binding. The video doesn’t specify, suggesting that the technique adapts to any width you typically prefer. Consistency along all sides remains the goal.
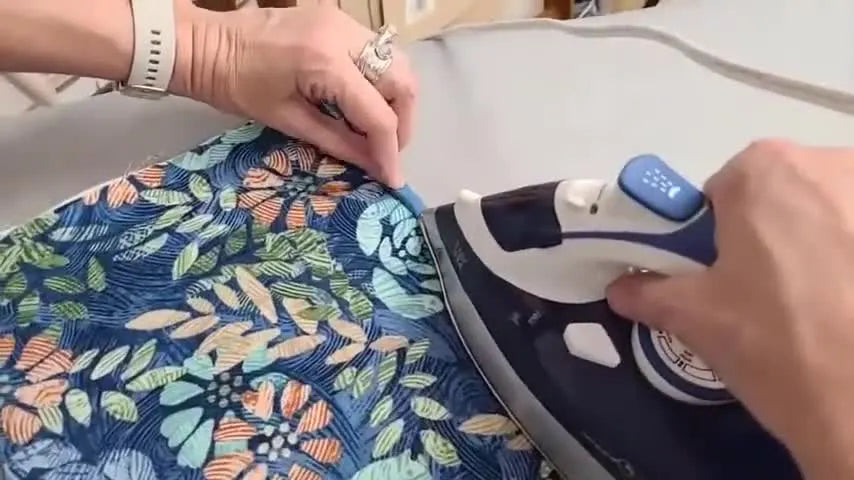
Step 3: Fusing the Binding to the Front

Move to your ironing board. Fold the binding over to the front, barely covering the line of fusible thread. Lightly mist with water to help generate steam.

Now press firmly using a hot, steamy iron—this melts the fusible layer underneath, temporarily adhering the folded binding to the quilt front.

Watch Out
Use care with that heat! The instructor reminds us that fusing requires a good amount of steam and temperature, so mind your fingers.

Let it cool for a few seconds, then test your edge—it should stay put even without clips. This pin-free stage prepares it perfectly for a clean topstitch. If you’re into mixed-making setups, note how this efficiency mirrors accessories found in embroidery systems using brother magnetic hoop designs—though the concept here helps hold fabric layers instead of embroidery blanks.
Step 4: The Final Topstitching

Before topstitching, remove that fusible-thread bobbin! Replace it with one loaded with regular thread.

Next, attach a binding foot to your machine’s shank. Its built-in guide rides along the fabric edge, keeping your seam uniformly straight.

Using a Binding Foot for Precision
Keep your needle in the center position, as shown in the video. The binding foot works similarly to alignment aids familiar to those who use magnetic embroidery hoops for brother—it ensures perfect guidance throughout.
As you sew, guide the quilt so the binding edge hugs that ridge on the foot. The fused layer underneath ensures everything stays flat while the topstitch secures it permanently.

From the Comments
Several viewers loved their binding feet and wished for a product link—though none was shared in the video, the mention suggests these accessories are available for machines from both Brother and Baby Lock. Think of them as the quilting counterpart to brother magnetic embroidery frame tools in embroidery.
The Big Reveal: A Flawless Finish

The reward for careful prep and fusing is immediately visible: even seams, neat corners, and no stretching. Flip the project over—your back edge looks every bit as clean.

Inspecting the Results
The instructor flipped her sample and found consistent stitching front and back. The fusible thread made alignment so precise that even while talking and sewing, her seams stayed straight.
Bonus Insight
One commenter shared an alternative: attach the binding to the front first, fuse, then stitch in the ditch. It’s a slight variation that hides the seam entirely on the front with stitching seen only on the back.
When to Try It
If you’re doing multiple quilts in a row—or teaching this technique—its efficiency saves time. The instructor said she completed four quilts back-to-back using fusible thread, calling it a “game changer.”
Quick Reference Recap
- Prep: Wind a bobbin with fusible thread; use regular thread on top.
- First Stitch: Sew binding to the quilt back.
- Fuse: Fold binding to front, mist, and press hot.
- Final Stitch: Switch to regular bobbin and attach the binding foot.
To improve your setup, explore guided accessories like a brother embroidery machine for versatile crafting, or structured frames akin to a magnetic hoops for brother configuration that mirror the concept of alignment perfection.
From setup to final stitch, this fusible-thread trick shows that precision isn’t about perfection—it’s about smart prep, good tools, and one clever heat-activated idea.